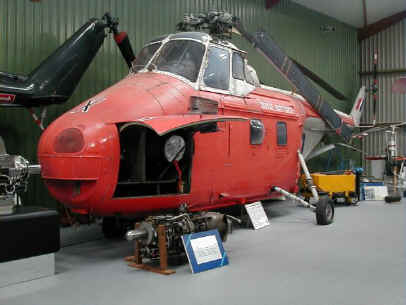
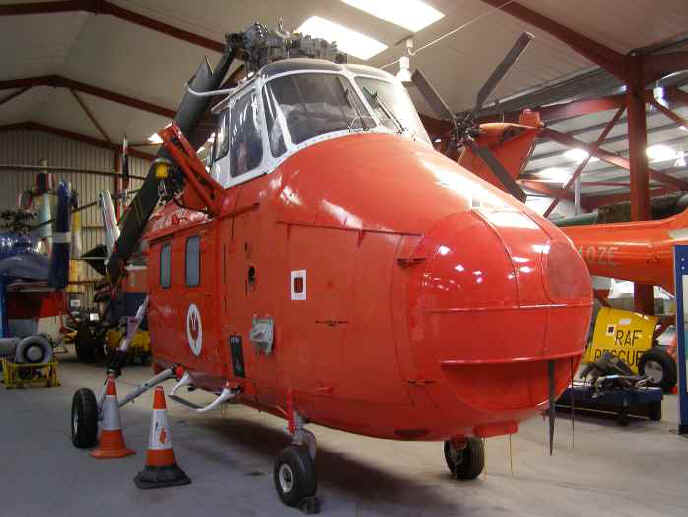
Restoration of Westland Whirlwind HAR.10, XD163
Whirlwind XD163 HistoryWestland Whirlwind HAR Mk.10, XD163, code 'X', started life as the first production Mk.4, built at Yeovil in 1954 to provide an 8-seat transport for the RAF. It was powered by one Pratt & Whitney R-1340-57 supercharged radial piston engine, serving with No.155 Squadron as a troop transport, based at Kuala Lumpur in Malaya, after being shipped out to Singapore on H.M.S. Ocean. From early 1959, XD163 served with 275/228 Squadrons, on SAR duties, at Leuchars, in Scotland, and at Leconfield. |
 |
||
In 1962, at Westland's Weston-super-Mare factory, it was converted to Mk.10 configuration, with one 1050 shp Gnome H1000 turboshaft replacing the piston engine in a modified and lengthened nose, giving more power, reduced weight and improved reliability. |
|||
| In 1964, as a Mk.10, XD163 was serving at RAF Akrotiri, in Cyprus, on SAR duties, followed by a two month detachment, in 1965, to the Khormaksar SAR Flight in Aden. It returned to the UK in 1966, for overhaul at Wroughton, and subsequent use by the Central Flying School (Helicopters), at RAF Ternhill and RAF Shawbury, with occasional detachments to RAF Valley. | |||
 |
While serving with CFS, XD163
was sent to RAF Finningley for display at the Queen's Silver Jubilee
Review, on 29th July 1977. It was withdrawn from active service in
1979, allocated maintenance serial 8645M, stored at Wroughton and
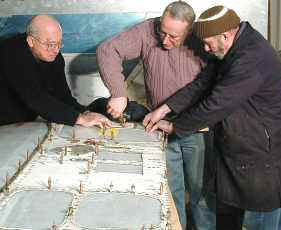
acquired by Elfan ap Rees in 1980. XD163 remained at Wroughton, on loan to the Science Museum collection, until 6th April 1991, when it was collected by Friends members, Adrian Brimson and John Phillips (left), and transported to The Helicopter Museum for display in its 1978 CFS livery. Soon after arrival, at The Museum, a Gnome turboshaft engine was fitted and tail rotor drive components were installed. The flexible fuel tanks were re-fitted below the cabin floor and sundry other components were re-assembled or replaced. |
||
| Twelve years after arrival at The Museum, followed by a long exposure to the salt-laden seaside atmosphere, the Whirlwind was moved into the Restoration Hangar where conservation work re-started in July 2003. We followed its progress, with words and pictures, on these pages, until completion in 2008. | |||
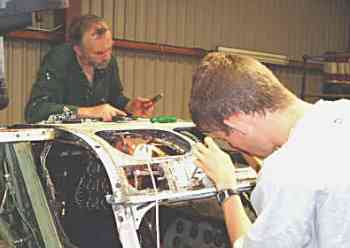
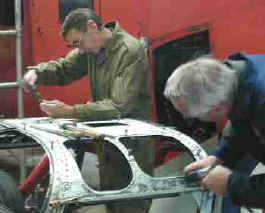
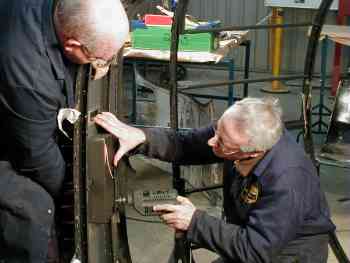
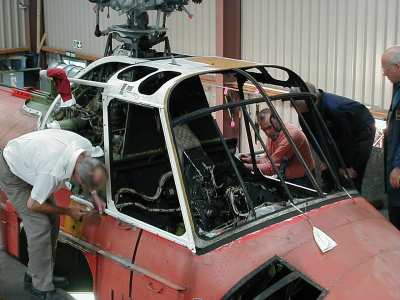
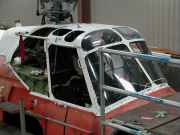
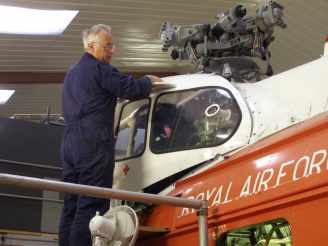
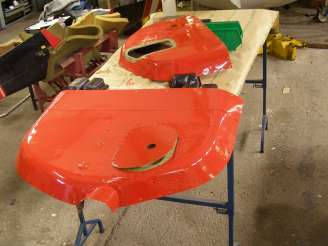
Whirlwind RestorationXD163 was given a partial structural survey in June 2003. Following the survey it was decided that a comprehensive restoration was necessary, before it could be returned to static display.The cockpit roof had suffered severe corrosion and daylight could be seen through it from inside. On 9th August Mike and James started preparing for the delicate job of removing the decayed roof and its glazing, while ensuring that sound structures beneath were not damaged in the process. Photo (right) by Mike Reading. It was later decided that all of the windscreen panels and frames would be removed for inspection, cleaning and repainting. Work started on 16th August to detach wiring looms and other items from these windscreen frames. |
 |
||
| Work also started to remove the main rotor blades. Two came off successfully but the two taper pins securing the third blade had suffered more from corrosion, so were soaked in rust-removing fluid for a few days until a further attempt could be made. One of the two taper pins on the remaining blade was extracted on 16th August but the second pin was more stubborn and required a bit of differential thermal expansion, some days later, before it too could be extracted and the final blade removed. | |||
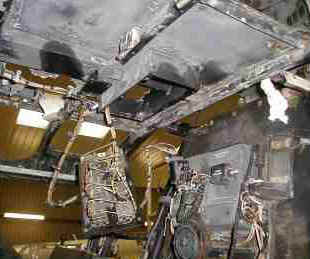 |
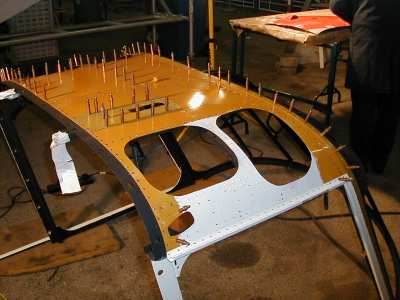
All the fittings and wiring looms were stripped out of the interior of the cockpit. Photo (left) of XD163 on 20th August 2003, is looking across from the left side towards the rear bulkhead. This work was done in preparation for the removal of the whole of the cockpit canopy frame (right) which eased the task of cleaning off and inhibiting corrosion prior to the manufacture of a new roof top panel and complete re-painting. | 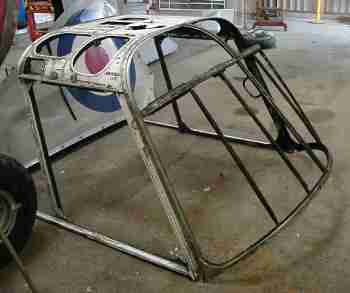 |
||
| The canopy frame was lifted off the fuselage
on the 23rd August 2003 and the extraction of more than 400 rivets, which secured the roof
panels, was under way on the 6th September (right). The corroded panels were
removed from the frame on 13th September 2003. Meanwhile the two tail rotor blades and hub had been removed and the pitch control mechanism was partially dismantled. The universal joint, part way down the tail rotor drive shaft above the tail boom, was found to be missing but a substitute was found and prepared for fitting. |
 |
||||
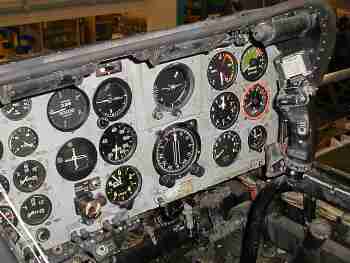 |
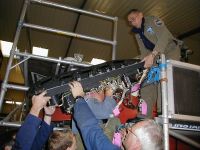
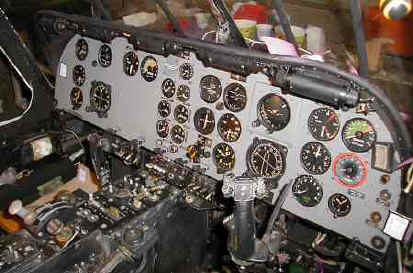
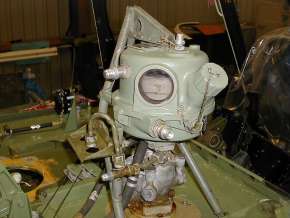
Photographed on 27th August 2003,
the instrument panel (left) was already tilted to the vertical
and, three days later, was lifted clear with instruments still in place. With the cockpit canopy frame removed, access to
the rear of the panel, to detach the many connectors, had been relatively easy.
In early October 2003 the tail rotor drive shaft sections were removed, repainted and replaced. One of the shaft support brackets was found to be fractured and this was removed and replaced by one from a donor Whirlwind. Meanwhile, work continued on dismantling some of the cockpit fittings and on repairing and cleaning the cockpit canopy frame which had been removed in August. In the following weeks the tail rotor drive shaft covers were re-painted. |
||||
 |
 |
|
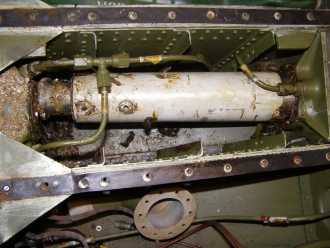
| In early December 2003 Mike Addicott overhauled and repainted the oil cooler (above left) and replaced it behind the main gearbox. The cooler securing brackets had also been cleaned and repainted (above right). | ||
 |
 |
|
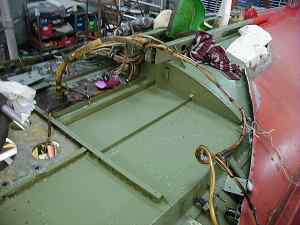
| Later in December the bulkhead panels between the rear of the cockpit and the main gearbox were removed. These had corroded badly, due to entry of water from above, and were rebuilt by our sheet metal experts who, by February 2004, were also working on the replacement cockpit roof (above right). New volunteer, Stuart (above left), completed the painting of the canopy frame. | ||
 |
||
 |
||
| In March 2004 a new cockpit roof for Whirlwind XD163 was cut from alloy sheet and drilled (above, top), using the remains of the original corroded roof as a template, before being primed and pinned to the newly-renovated canopy frame (above). It was then partially painted while riveting was carried out. | ||
 |
 |
|
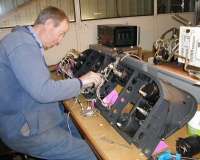
| While the cockpit canopy was being refurbished Mike Reading was dismantling the instrument panel, cleaning, repairing and overhauling the instruments, replacing broken components and then reassembling everything (left). Meanwhile the cockpit floor was being cleaned up and several small corrosion patches were being treated before fresh primer was applied (right). | ||
 |
 |
|
| The bulkhead between the upper rear cockpit and the gearbox was in a severely corroded state (left) when removed in April 2004. New alloy sheet was cut to size, riveted and bolted to build a new bulkhead. New acoustic board was attached to one side. Whenever possible original fittings were reclaimed, renovated and used again. On 12th May, after thorough priming and painting, the new bulkhead was mounted forward of the gearbox and over the slanting transmission shaft tunnel (right) covered with the original acoustic insulation fabric. | ||
 |
||
| On 15th May 2004 the renovated and partially repainted cockpit roof and glazing frame was lifted and replaced over the cockpit after preparation and painting of appropriate sections of the fuselage and interior. All went well and, after a bit of gentle persuasion, the frame was refitted and bolted into place (above). | ||
 |
 |
|
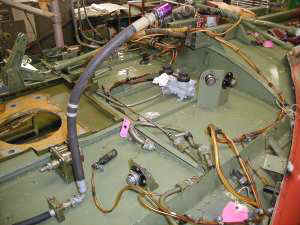
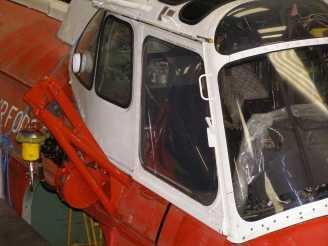
| In June and July 2004 most of the windscreen glazing was refitted (above left). Unfortunately there were several deep scratches in one of the perspex panels, which proved difficult to remove. They were eventually cleared, using some graded abrasive papers, though at the expense of some localised optical distortion. The cable harnesses and control panels, for the UHF radio, have been replaced within the cockpit canopy frame (above right). | ||
 |
 |
|
| In late August 2004 a fuselage skin panel (above left), below the aft radio compartment, found to be badly corroded, was replaced by an almost identical panel removed from a donor Whirlwind. The mounting box, for the lower UHF aerial, which was attached to the panel, was also replaced (above right) on 4th September 2004, the original box having suffered similar corrosion. | ||
 |
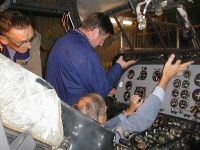 |
|
| On 16th October 2004 the refurbished
instrument panel was raised onto the scaffold platform and installed
in the cockpit. (above and below) |
||
 |
||
 |
 |
|
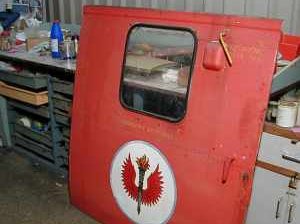
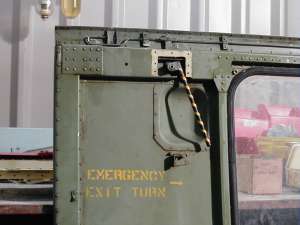
| In early December 2004 it was found that there was some corrosion in the right hand sliding door as well as in parts of the airframe around the doorway. Removing the door for treatment was difficult because corrosion, around the sliding locking rod at the top of the door (above right), prevented it's withdrawal. It was eased out with some gentle hammering and application of rust-removing fluid | ||
 |
 |
|
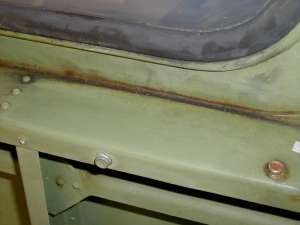
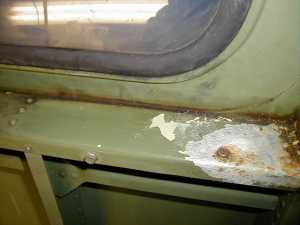
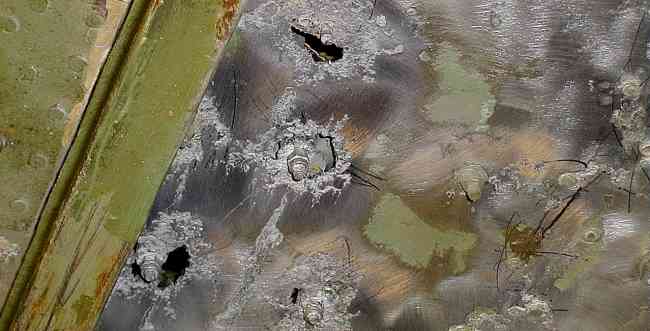
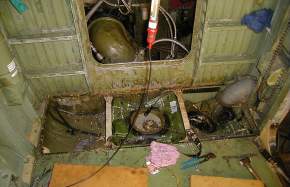
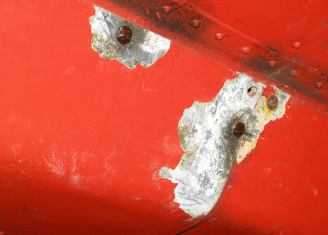
| Serious work has started on preparing the cabin interior for cleaning and repainting. As usual the difficult decision has to be made as to whether the original paint is to be completely stripped off, in the knowledge that corrosion can often lurk beneath apparently sound paint. This was well illustrated on 4th December 2004 when paint on a channel frame below the right side cabin window, which seemed to be in fairly sound condition (above left), flaked off when disturbed and exposed patches of corrosion (above right). It appeared that the original primer had not adhered to the bare metal in that area. | ||
 |
||
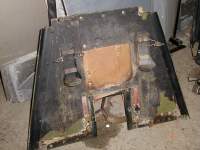
| In early January 2005, while removing heavy corrosion from the cabin roof, it was realised that one of the metal deck panels, below and slightly to the rear of the gearbox, was perforated in several places (above). To allow replacement, or even patching, of the panel it was decided that the main rotor head and gearbox would have to be lifted from the deck. | ||
 |
 |
|
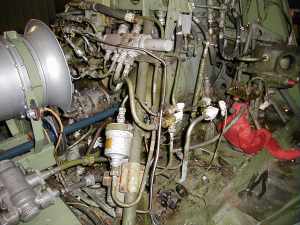
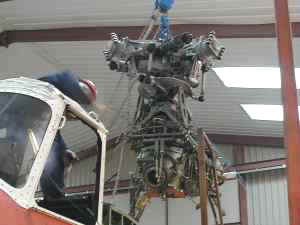
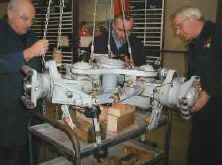
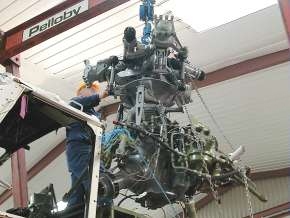
| Throughout much of January 2005 work continued to disconnect the maze of control rods, oil pipes and hydraulic lines (above left) which surround the transmission and main rotor head. The drive shaft from the engine and the drive shaft to the tail rotor were disconnected. On 12th February 2005 the securing bolts were removed one by one and the entire assembly was lifted from the deck (above right) and lowered slowly onto a waiting trolley. | ||
 |
 |
 |
||
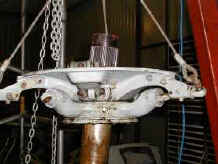
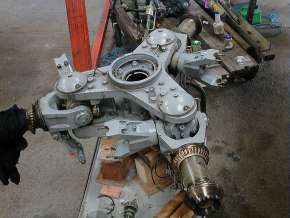
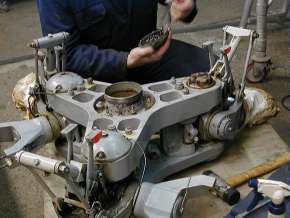
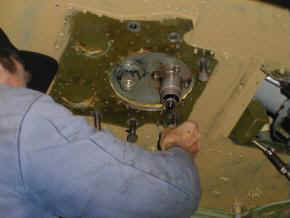
| It was known that the main rotorhead would not rotate so, on February 26th 2005, it was disconnected and easily removed from its shaft (above left). The rotating and non-rotating swashplate assemblies (above centre) were very difficult to lift from the gearbox because of corrosion between the shaft and the spherical swashplate bearing. Eventually, using a hoist with pulleys, the lift was achieved (above right) revealing the corroded shaft. | ||||
 |
 |
|
| As soon as the gearbox had been removed it was confirmed (above left) that the deck above the cabin would have to be stripped, cleaned and re-painted and that the corroded areas would have to be patched and treated. Work continued throughout March 2005 and, by April 2nd, patching and painting was in progress (above right). | ||
 |
 |
|
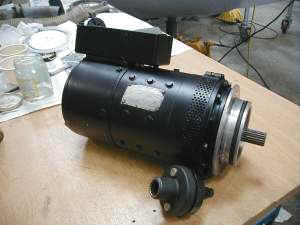
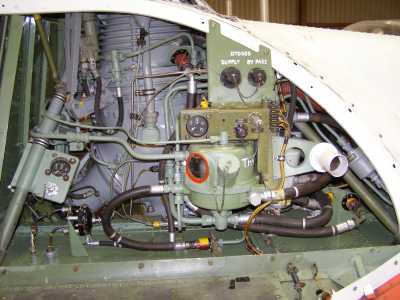
| The generator was missing from XD163 when it arrived, but, in April 2005, one was recovered from a spare Whirlwind gearbox and was completely refurbished and painted (above left) for later attachment to the transmission. In May 2005, with patching and painting of the deck completed, work started on replacing oil pipes, pressure sensors, hydraulic lines and fittings (above right). | ||
 |
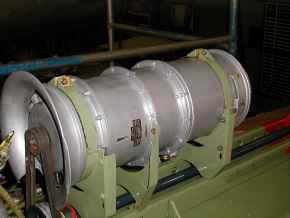
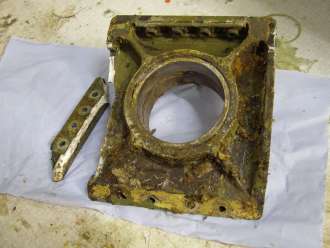
| XD163's gearbox and its attachments, which had been lifted from the fuselage deck with the rotorhead, in February 2005, were thoroughly cleaned and overhauled, externally, before being painted in August 2005. |
 |
 |
|
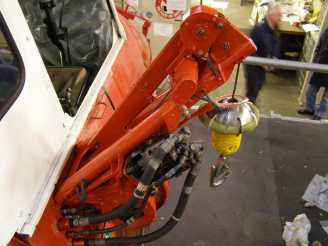
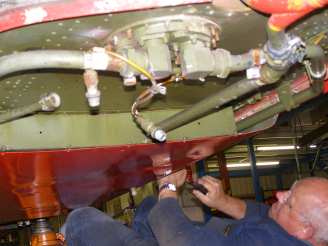
| Also in August 2005, a winch, (above left), taken from a Royal Navy Whirlwind, was being reconditioned. When completed it will be painted red and mounted on XD163's right side, above the cabin door. The helicopter's original winch is missing. The small hydraulic pump (above right), used to power the winch, was re-bolted onto the deck, below the hydraulic fluid reservoir. The pump is driven from the gearbox, via a belt drive running below the deck. | ||
 |
 |
|
| Work continued on refurbishing, painting and re-assembling XD163's rotorhead components throughout October and November 2005, | ||
 |
 |
|
| Progress with the refurbishment of XD163's cabin interior was visible (left) on 3rd December 2005, when a new area of re-painting was started. Meanwhile the completed rotorhead was slowly lowered onto the drive shaft above the gearbox and swashplate assembly (right). | ||
 |
 |
|
| The rotorhead and gearbox assembly was ready for reinstallation, on the deck of XD163, by the end of 2005. On 14th January 2006 the assembly was hoisted from its trolley and carefully lowered into place (above left). The gearbox was then bolted to the deck, from inside the cabin (above right), and work began on re-connecting lubrication, hydraulic lines and control rods. | ||
 |
 |
|
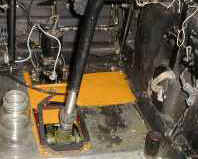
| By the end of February 2006 most of the reinstallation of XD163's rotorhead and gearbox had been completed (above left). Meanwhile, because of patches of corrosion on the skin of the lower fuselage and on the floor beams, it was decided that the cabin floor panels would have to be lifted to allow closer inspection. This gave access to the flexible rubber fuel tanks (above right), three of which were removed to allow corrosion to be treated. Corrosion in the floor panel fixing bolts slowed the work. | ||
 |
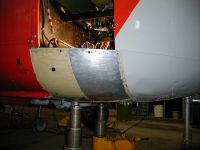
| By April 2006 the reinstallation of XD163's transmission and gearbox was complete and the rear fairing for the oil cooler, with air intake and exit louvres, was in place. |
 |
 |
|
| The reclaimed hydraulic winch, with its components cleaned and overhauled, has been re-assembled and painted ready for installation when the restoration of Whirlwind XD163 approaches completion. | Two removable access panels, on the rear right side of XD163, were found to have patches of severe corrosion. In May 2006 new panels were being manufactured, with one now in place on a trial basis. | |
 |
 |
|
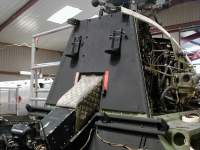
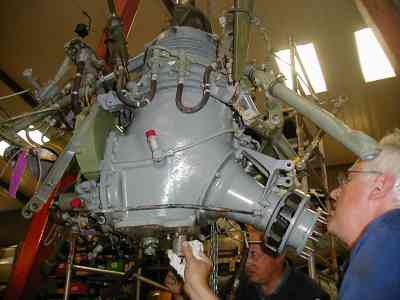
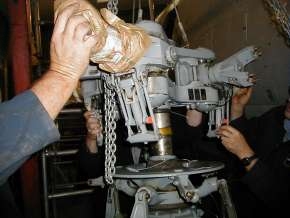
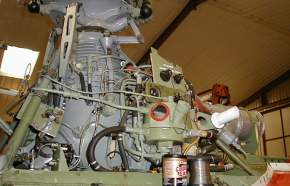
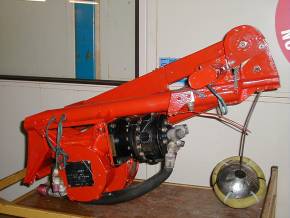
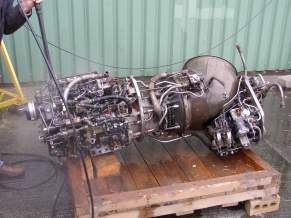
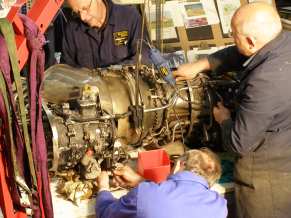
| It had always been known that the Rolls- Royce Gnome Mk.501 turboshaft, installed in XD163 (above) many years ago, for display purposes, was not the original engine or even a military version. In the interests of authenticity it was decided that this civilian Gnome would be removed and that an available Mk.101 military version would be installed in its place. | No suitable trestle was available so a horizontal beam, with adjustable supports, was manufactured locally and used in conjunction with a compact 2-ton hoist. A roller trolley on the beam allowed the freed engine to be swung out sideways and lowered onto a waiting transit stand. Removal took place (above), as planned, on 13th May 2006. | |
 |
 |
|
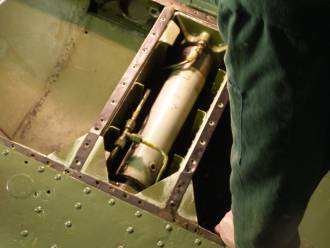
| A week later, on a fine Spring day, the military 1050shp Gnome turboshaft was taken out of the Restoration Hangar to be given a pressure wash (above). | On 27th May 2006, with the clean military engine returned to the hangar, a team effort was applied (above) to refurbish the engine, prior to installation for display. | |
 |
 |
|
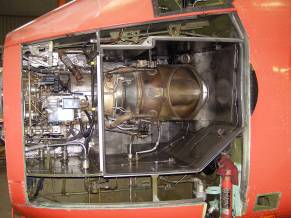
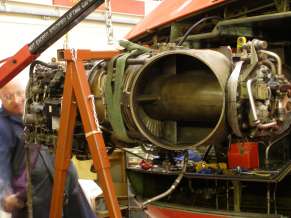
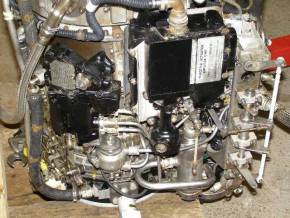
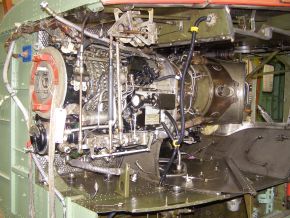
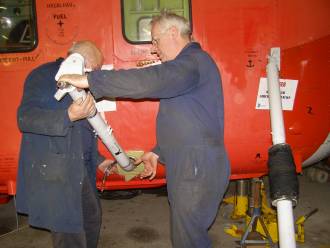
| Work proceeded on a complete external refurbishment of the Gnome Mk.101 military engine through June and July 2006. Most of the fuel pipe and actuator rod assemblies were dismantled and cleaned. | On 12th August 2006 the engine was installed in XD163, using the horizontal beam and roller trolley which were used for removal in May. It didn't work as smoothly as then, but useful lessons were learned. | |
 |
 |
|
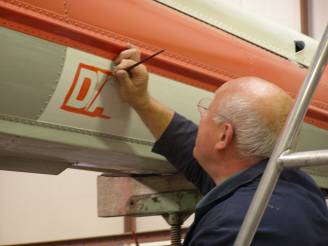
| Re-painting of the cabin forward bulkhead was nearly complete in November 2006. | On 4th November 2006 Stuart was practicing his stencil skills on XD163's tail boom. | |
 |
 |
|
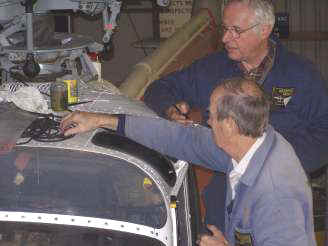
| By early December 2006 the canopy's removeable side panels were fitted, after re-glazing. | Mike Reading and Mike Jarvis were re-glazing the cockpit roof on 6th January 2007. | |
 |
 |
|
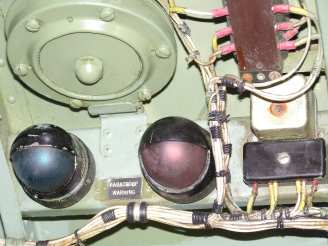
| The roof-mounted monorail (above left), after removal from XD163's cabin, was being cleaned, in January 2007, and prepared for re-painting. The monorail was intended to provide static line anchorages for up to six paratroops. Refurbishment of the two jump lights, green and red, and a klaxon, mounted above the cabin door (above right), was nearly finished. | ||
 |
 |
|
| In early February 2007 the restored ex-Navy winch was bolted to the fuselage, above the cabin door, and the hydraulics were connected. | On 17th February 2007 the left and right sliding windows were installed, initially with some difficulty due to slight distortion of the canopy. | |
 |
 |
|
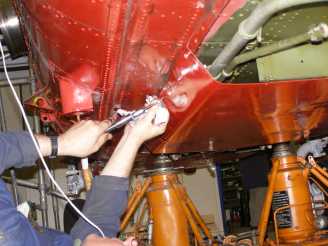
| It was always thought that there was corrosion in the under-fuselage fuel pipe fairings, their fasteners and their rivets. This was confirmed when the fairings were examined more closely. | On 28th February 2007 work commenced on removal of the under-fairings and covers, which were all then treated for corrosion or completely replaced with locally manufactured replicas. | |
 |
 |
|
| Two of the fuel pipe cover panels were repaired, treated for corrosion and repainted by May 2007. | Meanwhile, on 9th June, the finishing touches were being applied to the cabin interior. | |
 |
 |
|
| On 9th June 2007 Stuart and Mike were replacing the newly painted under-fuselage fuel pipe fairings. | ||
 |
 |
|
| After overhauling and replacing the skid components, Mike Addicott refitted them on 7th July 2007. | ||
 |
 |
|
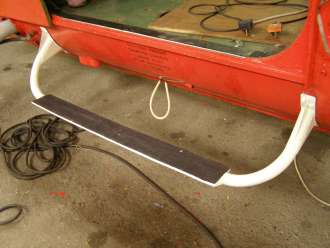
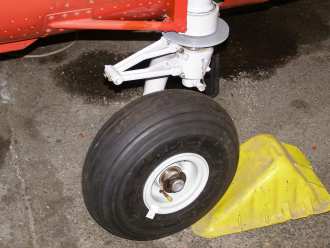
| On 8th August 2007 Stuart refitted the cabin step, after refurbishment and repainting. | The two forward oleos and castoring wheels were rebuilt before installation in mid-August 2007. | |
 |
 |
|
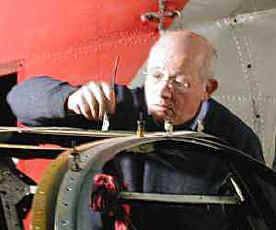
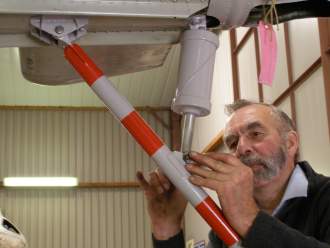
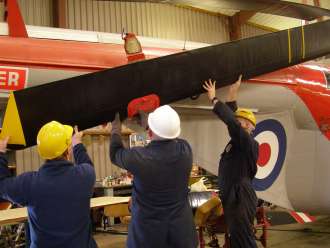
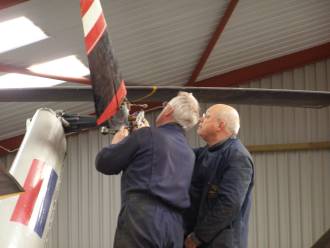
| On 16th August 2007 work started on the refurbishing and painting of XD163's three main rotor blades. This work was finished by late October 2007 and the first blade was refitted to the rotor head. On 3rd November 2007 the remaining two blades were fitted and installed in their folded position. | ||
 |
 |
|
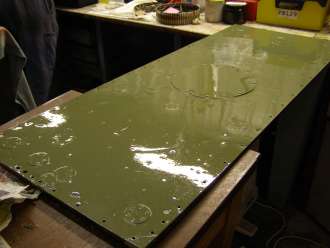
| By mid-December 2007, work on the refurbishment of the under-floor fuel tanks was nearing completion and the flooring panels were being cleaned, repaired and re-painted (above left). Re-laying of the floor panels was completed on 29th December, with some paint retouching finished on 5th January 2008. | ||
 |
 |
|
| It had been hoped that XD163 could be rolled out into the Display Hangar on 13th January 2008 but it was found that the left side main undercarriage leg, which acts as a radius strut for the assembly, had not been properly secured into its underfloor, inboard, bracket bearing (above left). The consequential extra load on the outboard bearing had caused it to fracture (above right). | ||
 |
 |
|
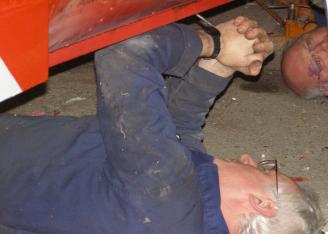
| A replacement outboard bearing bracket was obtained from a donor Whirlwind and fitted to XD163. On 9th February 2008 the left main undercarriage leg and strut were refitted (above left) with close monitoring to ensure that the spigot, on the end of the strut, was pushed home before being rotated and fully locked into its inboard bearing bracket (above right). The integrity of the right side fittings was also carefully checked and found to be satisfactory, before the flooring was replaced. | ||
 |
 |
|
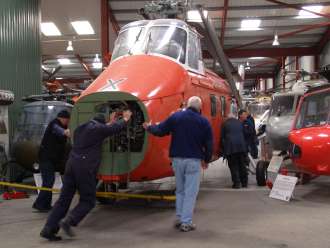
| By 15th February 2008 the Whirlwind restoration was 99% complete so the machine was rolled out into the Display Hangar to facilitate other aircraft movements, which were delayed four weeks previously because of XD163's problems. | With XD163 in its display position the tail rotor assembly was installed and the nose cone was re-fitted. A few interior details still needed some further work but most of these were attended to after the helicopter went on public display. | |
 |
||